Self-hosting an Authoritative DNS server with PowerDNS - Part 2: High-Availability and production
Table of Contents
- Installing another server somewhere else
- Data replication
- Putting the servers into production
- Conclusion
Now that we hosted our first authoritative DNS server, let's take that to the next level, setting up high availability and putting it in a real-world production: yours.
This article is one of a three parts series:
- A basic setup
- High-Availability and production (this article)
- Infra-as-Code and DNSSEC
Installing another server somewhere else
In order to have a highly-available system, we need to setup at least a second server, so that there is a failover server in case the first one goes down.
I don't have any advice to share about how many servers you'd need to achieve "true" high-availability, but make sure to put your servers across different ISPs or providers, so that a provider going down wouldn't be a single-point-of-failure.
You can follow the previous article of this series, A basic setup, to set up a secondary authoritative DNS server.
Data replication
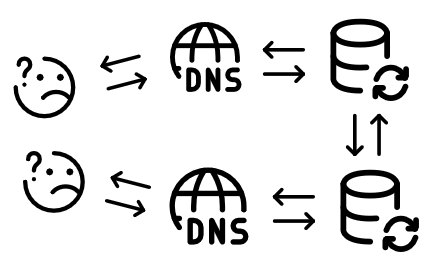
Once the secondary node is prepared, we now have two separate authoritative DNS servers. This is great, but actually, not that great. Every DNS record that we want to add on our zones will have to be manually created on all of our authoritative servers. This can become very cumbersone pretty quickly, and is also very error-prone (i.e. bad copy-paste, forgetting to create the record on the secondary server, etc.).
In order to fix that and automagically synchronize all of our records and zones across all of our servers, we can set-up some kind of replication.
If we take a look at the official PowerDNS documentation, we can see that we have a few way to achieve just that:
| Name | Description | Pros | Cons |
|---|---|---|---|
| Native replication | We replicate the underlying database | No configuration needed for PowerDNS, transparent setup | Extensive configuration on the database |
| Primary operation | A primary sends a notification to secondaries servers when changes happen | This is a standard way to replicate data across DNS servers, no need to touch the database configuration | More complex setup, requires tinkering with PowerDNS' configuration and zones configurations as well |
| Secondary operation | Instead of pushing a notification, all secondaries pull updates from the primaries | As updates shouldn't statistically happen at the same time, it should reduce the load on the primary server when replicating record modifications | More complex setup, requires tinkering with PowerDNS' configuration and zones configurations as well, slower to replicate record modifications |
Based on this comparison, we are going to use the "Native replication" to transmit record modifications across our authoritative DNS cluster.
In order to do that, we are going to set-up our database following a primary-secondary replication configuration. The primary database server will be the only one allowed to perform write operations to the database, while all secondaries will get a stream of modifications all while being strictly read-only. It is interesting to note that our secondaries can, in case of an emergency, become the new primary, but that's beyond the point of this blog article.
A common setup here is to make a kind of command-and-control configuration where all publicly accessible DNS+Database hosts are read-only secondaries while the primary server is not publicly accessible.
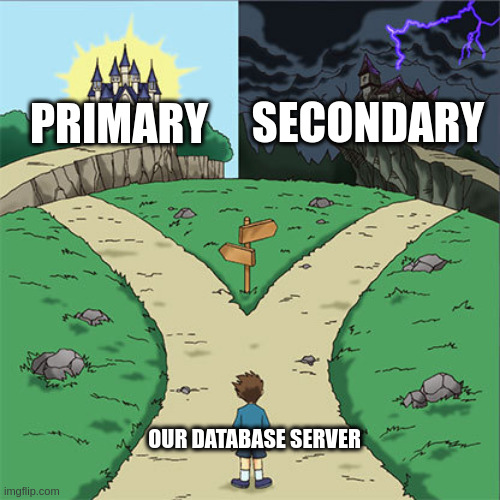
For this article, the first of our two servers is going to be our primary, while the second one is going to be - you guessed it - our secondary.
⚠️ Please make sure that you are securing the communication between your primary and your secondary servers, either using PostgreSQL SSL connections or using a secure and encrypted VPN, such as Wireguard.
On the primary
Let's first create our replication user:
sudo -u postgres bash -c "createuser --replication -P <replication user>"
This command should ask for the password for this new role with a prompt saying
Enter password for new role.
Then, we need to update a few Postgres configuration elements:
Under /etc/postgresql/17/main/postgresql.conf, we will need to uncomment and
set the following lines:
listen_addresses = '*' # To allow external communications (i.e. from our secondaries)
wal_level = replica # To rwite enough data to support WAL archiving and replication
synchronous_commit = on # How much WAL processing must complete before the database server returns a “success” indication to the client
max_wal_senders = 10 # Maximum number of concurrent connections from secondaries
synchronous_standby_names = '*' # Specifies a list of standby servers that can support synchronous replication
Then, under /etc/postgresql/17/main/pg_hba.conf, we need to add a line to allow
our replication user to log-in, at the very bottom of the file:
host replication <replication user> <secondary server IP>/32 scram-sha-256
Now that we have our replication user created and that we updated the database
configuration, we can restart the postgresql service using the trusty
systemctl restart postgresql.service command.
On the secondaries
On the read-only secondaries servers, the modifications are way simpler to perform.
First, the PostgreSQL service needs to be stopped, all existing databases need to
be deleted, and finally, the remote database needs to be initiated from the primary
host using pg_basebackup:
systemctl stop postgresql.service
rm -rf /var/lib/postgresql/17/main/*
sudo -u postgres bash -c "pg_basebackup -R -P -h <your primary IP> -U <replication user> -D /var/lib/postgresql/17/main"
The -R option in the last pg_basebackup command is there to create the correct
database configuration automatically from what has been replicated and supplied
from the CLI.
If all went according to plan, the following output should have been printed:
30969/30969 kB (100%), 1/1 tablespace
Finally, before restarting our secondary database service, we need to uncomment
and set only one line in /etc/postgresql/17/main/postgresql.conf, to set the
database server as a read-only "hot-standby":
hot_standby = on
Once all of this is done, the database service needs to be restarted using the
systemctl start postgresql.service command.
We can then check on the primary server that the replication is working:
$ sudo -u postgres psql -c "select usename, client_addr, state, sync_state from pg_stat_replication;"
  usename   |  client_addr   |   state   | sync_state
------------+----------------+-----------+------------
 <username> | <secondary IP> | streaming | sync
(1 row)
Now, we can just copy-paste, or scp, the primary's PowerDNS database configuration
file to our secondaries, to make sure that the /etc/powerdns/pdns.d/bind.conf
file has also been deleted on the secondaries, and finally restart the PowerDNS
service using systemctl restart pdns.service. The pdns.service should be running
and alive on the secondaries servers after all of these modifications:
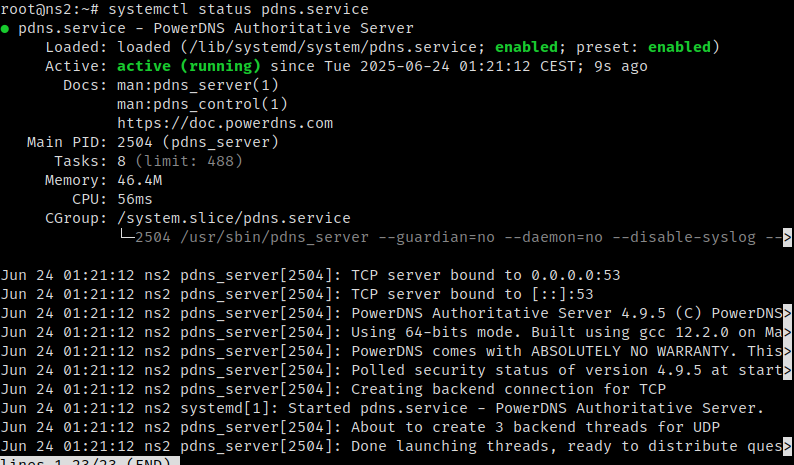
You don't need to create the PowerDNS database user, nor you need to change the PowerDNS database configuration, as the database permissions have been replicated to the secondaries aswell.
Testing the replication
On our secondary server, we can run the pdnsutil list-all-zones, which should
only return our example.com zone we created in the previous part.
We can add, from the primary server, new records to this zone for our second authoritative server, using the following commands:
pdnsutil add-record example.com @ NS ns2.example.com
pdnsutil add-record example.com ns2 A <your secondary DNS server IP>
Which should return the following lines:
example.com. 3600 IN NS ns1.example.com
example.com. 3600 IN NS ns2.example.com
New rrset:
ns2.example.com. 3600 IN A <your secondary DNS server IP>
And we should get these newly created records when manually querying the secondary server:
$ dig ANY example.com @<your secondary DNS server IP>

; <<>> DiG 9.18.36 <<>> ANY example.com @<your secondary DNS server IP>
;; global options: +cmd
;; Got answer:
;; ->>HEADER<<- opcode: QUERY, status: NOERROR, id: 37177
;; flags: qr aa rd; QUERY: 1, ANSWER: 3, AUTHORITY: 0, ADDITIONAL: 3
;; WARNING: recursion requested but not available

;; OPT PSEUDOSECTION:
; EDNS: version: 0, flags:; udp: 1232
;; QUESTION SECTION:
;example.com.			IN	ANY

;; ANSWER SECTION:
example.com.		3600	IN	NS	ns1.example.com.
example.com.		3600	IN	NS	ns2.example.com.
example.com.		3600	IN	SOA	a.misconfigured.dns.server.invalid. hostmaster.example.com. 0 10800 3600 604800 3600

;; ADDITIONAL SECTION:
ns2.example.com.	3600	IN	A	<your secondary DNS server IP>
ns1.example.com.	3600	IN	A	<your primary DNS server IP>

;; Query time: 10 msec
;; SERVER: <your secondary DNS server IP>#53(<your secondary DNS server IP>) (TCP)
;; WHEN: Tue Jun 24 17:56:07 CEST 2025
;; MSG SIZE  rcvd: 189

And that's it! We now have a replicated and highly-available authoritative DNS server ready to host our domains, we can now add/import our zones and their associated records and go straight to production!
Putting the servers into production
For this, we need to log into our domain's registrar control panel. I will stay vague volontarily as the process is different based on the registrar that you're using. I would strongly advise to follow your registrar's documentation.
In my case, using OVH as a registrar for some of my domains, I had to:
- disable the "Secured Delegation - DNSSEC" option, because we don't want our registrar to provide it on their side, as we are now hosting our own authoritative DNS servers.
- set "GLUE" records for the domain, which are records that the registrar is going to send upstream to the TLD nameservers so that people know the IPs of our authoritative servers.
- update the "DNS servers" with our new self-hosted authoritative DNS servers
Then, we just just need to wait a bit of time for the new settings to be replicated and globally available.
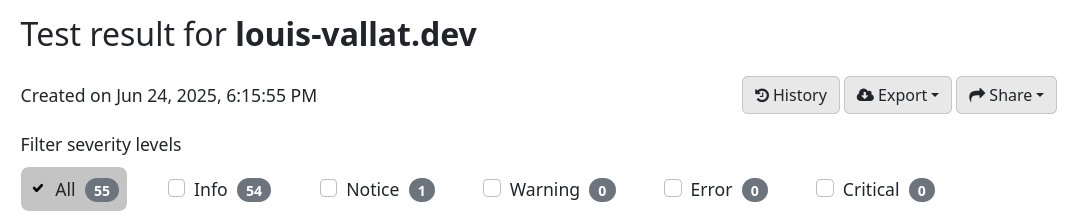
Finally, we can validate using the Zonemaster verification tool that our configuration is fine and working well, as shown in this screenshot for the test result for one of my domains:
Conclusion
Congratulation! You've now successfully set-up high-availability on your authoritative DNS servers, and put them into production! Next time, we will be taking a look at how to set-up IaC using OctoDNS and securing our zone records using DNSSEC! Thank you for reading and stay tuned!