Self-hosting Authoritative DNS servers with PowerDNS - Part 1: a basic setup
Table of Contents
- A TLD, a registrar and a zone
- What is an authoritative DNS server?
- Setting up the machine and installing PowerDNS
- Installing Postgres
- Telling PowerDNS to use PostgreSQL as its storage backend
- Final touches in the PowerDNS configuration
- Creating our first zone and records
- Conclusion
Let's see how we can self-host some authoritative DNS servers using PowerDNS, with PostgreSQL as the storage back-end, for gaining total control of our DNS zones (and its problems as well).
This article is one of a three parts series:
- A basic setup (this article)
- High-Availability and production
- Infra-as-Code and DNSSEC
![]()
But why would you host your own authoritative servers? Well, that's up to you, but personnally, I do it because I like owning my infrastructure from start to finish.
Don't get me wrong, I totally understand why you would want to delegate the hosting of your authoritative DNS servers. This is a pretty critical service and when it fails, whole domains go dark, so you'd need to properly deploy, maintain and monitor those servers, as well as have them across multiple providers to avoid having a provider becoming a single point of failure.
This is the scary part of self-hosting: all of a sudden, you're the one in charge, and let's face it, also the one to blame when things go inevitably south.
That's fine by me, because I like owning the problems of my own infrastructure. I don't like relying or depending on other systems or companies, paid or not. When things break, I want to know why, and I want to be able to dig into it and get it fixed.
And also, because self-hosting my own authoritative DNS servers allow me to learn more about how everything is structured on the internet.

A TLD, a registrar and a zone
So, as I explained in a previous article, the whole Domain Name System is like shaped like a tree: you have a root, branches, and at the end, a leaf. In our case, there is a root zone, then Top-Level Domains (TLDs), then you have domains, and under that, subdomains. Domains are right under TLDs.
You "buy"/rent a domain through a registrar, which is a company or an association which will do the paperwork for you with the people managing the TLD you chose, to get your domain registered against this TLD with this registrar.
Once this domain is registered, your registrar may let you use their DNS servers for managing said domain. The administrative space where they let you manage your DNS records is called a DNS zone.
In this article, we will be hosting and managing the zone(s) of our domain(s) ourselves.
What is an authoritative DNS server?
There are two kind of Domain Name Servers:
- recursive
- authoritative
A recursive DNS server will do complete queries for you, asking for information against other DNS servers for things that aren't in their cache yet. On the other hand, an authoritative DNS server will reply to only the data it knows about, and is generally used as the root servers for a domain (or subdomain).
Setting up the machine and installing PowerDNS
For this article, I am going to use a headless Debian 13 virtual machine running on Proxmox. PowerDNS doesn't have a minimal requirement specification nor a recommended one, but in my experience for hosting a handful of zones and a local database server, 1 CPU core and 512MB of RAM is enough. Again, depending on the number of zones that you need to host and the amount of traffic that you get, you may need to allocate more resources to it.
Following the current official PowerDNS installation documentation, we need to populate two files before installing the DNS software.
The first one is the Debian repository file, to tell Debian's package manager where to find the PowerDNS packages that we will be installing later:
cat <<EOF > /etc/apt/sources.list.d/pdns.list
deb [signed-by=/etc/apt/keyrings/auth-49-pub.asc] http://repo.powerdns.com/debian trixie-auth-49 main
EOF
The second file is a preferences file, telling apt which package and which
repository to prioritize:
cat <<EOF > /etc/apt/preferences.d/auth-49
Package: auth*
Pin: origin repo.powerdns.com
Pin-Priority: 600
EOF
Once this is done, we can now import PowerDNS' repository key, for making sure that the package that we will be installing is cryptographically signed from the PowerDNS team and hasn't been tampered with:
sudo install -d /etc/apt/keyrings; curl https://repo.powerdns.com/FD380FBB-pub.asc | sudo tee /etc/apt/keyrings/auth-49-pub.asc
Now, we can update our package repositories index and install the PowerDNS server!
sudo apt-get update
sudo apt-get install pdns-server
This will install the PowerDNS authoritative server and its default backend, which uses bind. We will replace it later with our own PostgreSQL database.
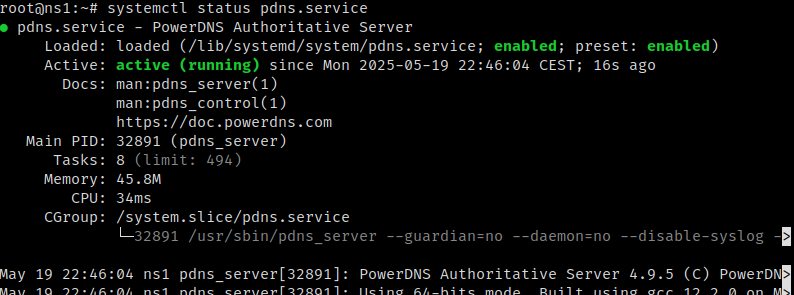
Now we can run a quick systemctl status pdns.service and voilà, our server is
(nearly) ready to answer DNS requests!
Regarding firewall rules, I would (highly) recommend to open port 53 for both UDP and TCP.
Installing Postgres
Now that we have the DNS software part sorted, we need to setup its storage. For this, PowerDNS accepts a lot of different storage backends, such as SQLite3, MySQL or PostgreSQL, which we will use for this installation. A list of them and their limitations are listed on PowerDNS' documentation page.
PostgreSQL is already available in the default Debian repositories. We could install a more up-to-date version, but the one available by default on Debian is perfectly fine. If you would like to install it through the PostgreSQL official repositories, feel free to follow the instructions on the official installation documentation from PostgreSQL.
sudo apt-get install postgresql
We can also check that the database engine service is enabled and running with
the command systemctl status postgresql@17-main.service:

Simple, right?
Telling PowerDNS to use PostgreSQL as its storage backend
On one side, we have an authoritative DNS server, and on the other hand we have a database engine, it would be nice to have them talk to each other, right?
First, let's connect to PostgreSQL's admin console, using sudo -u postgres psql.
We should be greeted by the following prompt:
psql (17.5 (Debian 17.5-1))
Type "help" for help.

postgres=#
Now, let's create our PowerDNS user and database.
CREATE USER pdns ENCRYPTED PASSWORD '<your super secret password>';
CREATE DATABASE pdns OWNER pdns;
This is all you need to do on Postgres' side. Regarding PowerDNS, we need to remove the default backend, bind, and install the PostgreSQL backend:
sudo apt-get remove pdns-backend-bind
sudo apt-get install pdns-backend-pgsql
These commands will trigger an automatic restard of the
pdnsservice, which will inevitably fail to start (as we didn't configure the backend yet), this is expected.
Let's import the base database schema in our fresh and empty database:
psql -h 127.0.0.1 --user pdns --password --dbname pdns < /usr/share/doc/pdns-backend-pgsql/schema.pgsql.sql
If the command went well, the output should be composed of a bunch of
CREATE TABLEandCREATE INDEX.
Now, let's tell PowerDNS to connect to the database we prepared for it instead of
using the default bind backend, which isn't even installed anymore!
rm /etc/powerdns/pdns.d/bind.conf
cat <<EOF > /etc/powerdns/pdns.d/gpgsql.conf
launch=gpgsql
gpgsql-host=127.0.0.1
gpgsql-port=5432
gpgsql-dbname=pdns
gpgsql-user=pdns
gpgsql-password=<the same secret password you defined in the PSQL console earlier>
gpgsql-dnssec=yes
EOF
And now we can restart our PowerDNS server using systemctl restart pdns.service.
If our configuration is correct, the systemctl status pdns.service command will
show our PowerDNS server as up and running! Great success!

Final touches in the PowerDNS configuration
Let's take a look at the /etc/powerdns/pdns.conf configuration file before
wrapping things up. There is one customization that I highly advise to make,
about the default SOA content. This can be done later when creating a zone but
it's way easier to set it in configuration and forget it, instead of having to
remember to update it when creating a zone later on.
The config field I'm talking about is default-soa-content and I highly
recommend setting it with the correct SOA settings for your domains.
Personnally, I use this value for my zones:
ns1.louis-vallat.dev. contact.louis-vallat.dev. 0 14400 3600 604800 3600.
For more information on this kind of record and why it is an important one for your zones, I recommend reading Cloudflare's blog article about SOA records and their structure.
If you want to do some kind of security by obscurity, you can also set the
version-string to anonymous instead of the default full.
Creating our first zone and records
Our server is alive and healthy, but if we query anything from it, it won't reply
anything, as it doesn't know anything (see the status: REFUSED in the reply):
$ dig A example.com @<your DNS server IP>

; <<>> DiG 9.18.36 <<>> A example.com @<your DNS server IP>
;; global options: +cmd
;; Got answer:
;; ->>HEADER<<- opcode: QUERY, status: REFUSED, id: 38377
;; flags: qr rd; QUERY: 1, ANSWER: 0, AUTHORITY: 0, ADDITIONAL: 1
;; WARNING: recursion requested but not available

;; OPT PSEUDOSECTION:
; EDNS: version: 0, flags:; udp: 1232
;; QUESTION SECTION:
;example.com.		IN	A

;; Query time: 1 msec
;; SERVER: <your DNS server IP>#53(<your DNS server IP>) (TCP)
;; WHEN: Mon May 19 23:20:34 CEST 2025
;; MSG SIZE  rcvd: 45
So let's create a zone and a few records, all through the pdnsutil CLI tool:
pdnsutil create-zone example.com
pdnsutil set-kind example.com MASTER
pdnsutil add-record example.com @ NS ns1.example.com
pdnsutil add-record example.com ns1 A <your DNS server IP>
pdnsutil increase-serial example.com
With these commands, we:
- created the 'example.com' zone
- told PowerDNS to run as master on this zone, as it operates alone for now
- created a NS record pointing to our DNS server and added an IP address to it
- increased the serial of this zone
We should get something like this as the output of these commands:
Creating empty zone 'example.com'
New rrset:
example.com. 3600 IN NS ns1.example.com
New rrset:
ns1.example.com. 3600 IN A <your DNS server IP>
SOA serial for zone example.com set to 1
And now, if we run again the query that failed against our DNS server using the
same dig command:
$ dig ANY example.com @<your DNS server IP>

; <<>> DiG 9.18.36 <<>> ANY example.com @<your DNS server IP>
;; global options: +cmd
;; Got answer:
;; ->>HEADER<<- opcode: QUERY, status: NOERROR, id: 56350
;; flags: qr aa rd; QUERY: 1, ANSWER: 2, AUTHORITY: 0, ADDITIONAL: 2
;; WARNING: recursion requested but not available

;; OPT PSEUDOSECTION:
; EDNS: version: 0, flags:; udp: 1232
;; QUESTION SECTION:
;example.com.			IN	ANY

;; ANSWER SECTION:
example.com.		3600	IN	NS	ns1.example.com.
example.com.		3600	IN	SOA	a.misconfigured.dns.server.invalid. hostmaster.example.com. 1 10800 3600 604800 3600

;; ADDITIONAL SECTION:
ns1.example.com.	3600	IN	A	<your DNS server IP>

;; Query time: 2 msec
;; SERVER: <your DNS server IP>#53(<your DNS server IP>) (TCP)
;; WHEN: Mon May 19 23:37:31 CEST 2025
;; MSG SIZE  rcvd: 155
As you can see, I didn't set the default SOA field in configuration and I forgot about setting when creating the zone...
From now on, adding records is just a matter of running the
pdnsutil add-record <zone> <subdomain> <type> <value> command and then running
pdnsutil increase-serial <zone>.
If we take a look at htop right now, we can see that we are barely using any resource,
under 140MB of RAM, and a load average near 0:

But that's expected as it's not serving any production requests yet, although serving DNS requests at a small scale isn't very demanding, so the usage will likely stay the same (unless you have a lot of requests to handle, and then you don't need my advice about how to scale your server resource-wise).
Conclusion
You've now successfully installed and configured your first authoritative DNS server, using PowerDNS and PostgreSQL! Next time, we will configure high availability through database replication, and use it in production! Thank you for reading and stay tuned!